Tools · 10 min read
Your First 7 Power Tools, in the Order You Should Buy Them
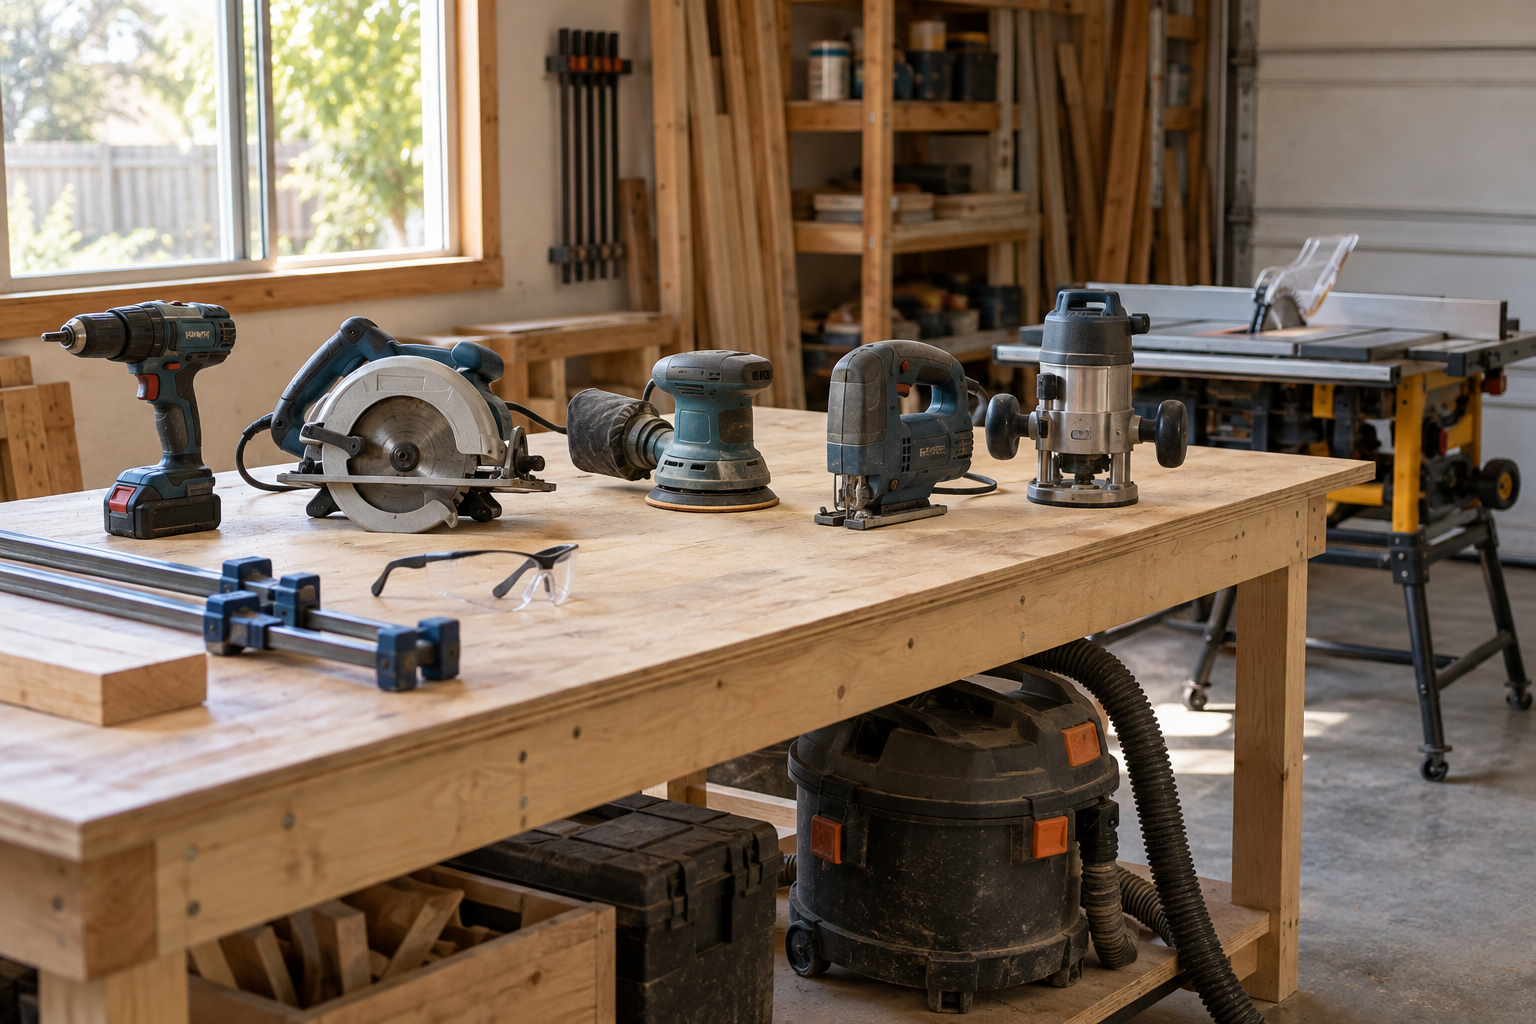
For a beginner building shelves, boxes, and small furniture, buy these seven power tools in order: drill/driver, circular saw, dust extractor or shop vacuum, random-orbit sander, jigsaw, router, and table saw. This sequence gets you building early without tying up your budget in large machines; buy each next tool when a project exposes a real limitation.
The best first power tools for a small woodshop
This order assumes you have limited space and will start with plywood and surfaced lumber. Rough lumber changes the equation: milling equipment becomes more important, although paying a lumberyard to surface boards can postpone that expense.
Yes, a vacuum gets a numbered spot. Dust control is part of operating the other tools, not a reward for finishing your shop.
These are estimated US prices for new, entry-level to midrange equipment—not sale promises. The drill price includes a battery and charger; the other tools are corded.
| Buy order | Power tool | Estimated price | What it adds |
|---|---|---|---|
| 1 | Cordless drill/driver | $100–$200 | Drilling, countersinking, and screw assembly |
| 2 | Circular saw | $60–$140 | Straight cuts in boards and sheet goods |
| 3 | Shop vacuum or compact dust extractor | $100–$220 | Source collection and cleanup |
| 4 | Random-orbit sander | $50–$110 | Efficient surface preparation |
| 5 | Jigsaw | $60–$140 | Curves, notches, and interior openings |
| 6 | Router | $120–$250 | Clean edges, grooves, and template work |
| 7 | Portable table saw | $350–$700 | Repeatable ripping and accurately sized parts |
The tools total roughly $840–$1,760. Budget another $350–$650 for basic work support, clamps, blades, bits, abrasives, dust accessories, and protective equipment. A certified HEPA extractor or substantial table-saw stand can push the total higher.
You do not need to spend that all at once. Your first useful shop might consist of two owned tools, a borrowed vacuum, and a sturdy work surface.
1. Buy a cordless drill/driver first
A drill/driver earns its keep before you make your first cut. With lumber cut by a supplier, you can assemble simple shelves, storage racks, and shop fixtures immediately.
Choose a variable-speed model with two mechanical speed ranges, an adjustable clutch, and a keyless chuck. A 1/2-inch (13 mm) chuck offers flexibility, although a compact drill with a smaller chuck can handle plenty of furniture work.
A good 12-volt drill is adequate for many beginner projects. An 18-volt-class model makes more sense if you expect to bore larger holes or drive long screws regularly. Pick the tool that feels controllable, not the biggest battery on the shelf.
What to buy with your first drill
Start with twist bits, a countersink, and driver bits that match your screws. A second small battery is usually more useful than one oversized battery that makes the drill awkward.
Use the Pilot Hole Size Calculator as a starting point, then test on scrap from the same board. Clamp the work rather than holding a small piece in your palm.
Skip the impact driver for now. It speeds up repetitive fastening, but a drill/driver can drill and drive. You need that versatility more than you need a second fastening tool.
2. Add a circular saw for straight cuts
A circular saw turns bought-to-size material into material you can size yourself. With a straightedge and proper support, it handles shelf parts, workbench components, and sheet breakdown without consuming permanent floor space.
A corded 7-1/4-inch (184 mm) saw is a sensible value. Prioritize a rigid shoe, readable adjustments, a smoothly returning lower guard, and a blade you can align easily with your cutting guide.
The included blade may favor fast construction cuts. For plywood and cleaner crosscuts, budget about $20–$45 for a suitable carbide blade. Match the blade diameter, arbor, and speed rating to the saw.
Make the support system before the project
Support the sheet on a stable cutting platform, with clearance beneath the blade. Rigid foam over a suitable platform can support both sides of a sheet without trapping the blade. Set cutting depth according to the saw manual; the blade should not hang unnecessarily far below the material.
Clamp your guide, keep the cord clear, and position yourself out of the likely kickback path. Never defeat the lower guard.
Plan sheet breakdown with the Cut List & Waste Optimizer. Allow for blade kerf and leave trimming allowance where a later operation will establish the finished edge.
3. Buy dust collection before a powered sander
A shop vacuum is not glamorous, but neither is coating your garage, lungs, and next finish coat with sanding dust.
For this price range, expect a decent shop vacuum with appropriate filtration or a basic compact extractor—not necessarily a certified HEPA system. Check the cost of compatible fine-dust bags, filters, and hose adapters before buying.
Useful features include:
- Secure hose connections and adapters for your tools.
- Manufacturer-approved bags and filtration suitable for fine wood dust.
- A hose flexible enough that it does not steer a sander.
- Tool-triggered operation, if the budget allows.
A filter labeled HEPA does not automatically make the entire vacuum a sealed, certified HEPA extractor.
Arrange dust control for the circular saw from the start, borrowing equipment if necessary. Capturing handheld-saw dust can be difficult, so use an appropriate work location, available extraction, and respiratory protection rather than assuming a hose catches everything.
A shop vacuum suits many small tool ports. It is not a substitute for a high-airflow collector on a future planer or jointer. Never vacuum hot debris or solvent-soaked waste, and avoid blowing fine dust around with compressed air.
4. Buy a random-orbit sander for surface preparation
A 5-inch (127 mm) random-orbit sander is a practical first sanding machine. Discs are widely available, and the tool works well on panels, shelves, and assembled furniture.
Look for variable speed, effective dust extraction, an easy-to-replace backing pad, and comfortable handling. Check replacement-pad availability; a cheap sander becomes expensive if a worn pad makes it disposable.
Buy a modest selection of abrasives instead of a giant bargain assortment. For reasonably clean, surfaced stock, 120, 150, and 180 grit cover many starting jobs. Rougher surfaces may need 80 grit first. Follow the finish manufacturer's preparation instructions rather than sanding every project to the finest grit available.
Let the abrasive do the cutting
Connect extraction, keep the pad flat, and move slowly with overlapping passes. Pressing hard does not reliably speed things up; it can stall pad rotation and leave uneven scratches.
Do not use the sander to erase deep saw errors. Correct the cut first. Plywood face veneers are especially unforgiving of concentrated sanding near an edge.
Wear eye protection and a properly fitted particulate respirator when exposure warrants it; dust extraction reduces exposure but does not guarantee clean breathing air.
5. Add a jigsaw when projects need curves
The jigsaw opens shapes your circular saw cannot safely make: curved brackets, rounded corners, notches, and interior cutouts.
Choose tool-free blade changes, variable speed, adjustable orbital action, and a base that locks securely square. A corded model is economical for occasional use.
Buy blades for the actual task. A narrow scrolling blade turns tighter curves; a wider blade generally tracks straighter. Tooth direction affects which face is more likely to splinter, so make a test cut with the same blade and material orientation.
For an interior opening, drill a starter hole large enough for the blade, insert it with the tool stopped, and begin with the base supported on the work.
Do not expect table-saw accuracy. The blade can bend below the surface while the visible cut follows your line. On a part that needs a refined edge, leave about 1/16–1/8 inch (1.6–3.2 mm) for cleanup by sanding or a suitable template-routing operation.
If your next several projects are entirely rectangular, postpone this purchase. That is sensible sequencing, not an incomplete shop.
6. Buy a router for edges and joinery
A router adds controlled shaping and joinery that the earlier tools cannot reproduce cleanly. Start with simple edge easing, grooves, and rabbets before moving into template work.
For general furniture projects, a midsize router accepting both 1/4-inch (6.35 mm) and 1/2-inch (12.7 mm) shanks offers more room to grow than a small trim router. A trim router remains a good choice if light edge work is your clear priority.
Look for variable speed and dependable depth adjustment. A plunge base is useful for cuts that start inside a panel, but you do not need a router table immediately.
Buy a few router bits, not a huge set
Start with a straight or spiral bit for a planned groove, a small roundover bit, and a bearing-guided bit only when a project calls for it. Expect roughly $20–$50 each for useful carbide bits, with specialty cutters costing more.
Use the Router Bit Speed Calculator as a planning aid, never as permission to exceed the bit or router manufacturer's limits.
Secure the work, keep hands away from the cutter, and take shallow passes. Feed against cutter rotation for ordinary handheld routing; avoid climb-cutting as a beginner. Disconnect power before changing bits, and reserve bits requiring table use for a suitable router-table setup.
7. Buy a table saw when repeatability becomes the bottleneck
A table saw comes last because the circular saw already covers many straight cuts. Its real upgrade is repeatability: several rails of identical width, consistent cabinet parts, and controlled cuts against a dependable fence.
Buy when repeated ripping or sizing is slowing your actual projects—not because every workshop photo has one.
Prioritize:
- A fence that locks securely and aligns correctly.
- A riving knife, blade guard, and complete safety hardware.
- A stable base and room for supported outfeed.
- Accessible controls and a dust port you can connect.
Consider flesh-sensing braking technology if you can afford it; these saws generally cost more than the basic range listed above. It supplements safe technique rather than replacing it.
Budget floor space as well as money
Feeding an 8-foot (2,438 mm) board requires clearance for the work's full travel, not merely space for the saw's footprint. Continue breaking down full sheets with the circular saw rather than wrestling them onto a small table saw.
Use guards and the riving knife as directed, appropriate push devices, and stable support. Do not make freehand cuts or trap a crosscut cutoff between the blade and rip fence. Avoid gloves around rotating blades and cutters.
Common mistakes when buying beginner power tools
- Buying a large combo kit first. Price the tools you will actually use. An unused reciprocating saw is not a woodworking bargain.
- Spending everything on machines. Clamps, a straightedge, a square, and solid work support directly affect accuracy and safety.
- Choosing cordless for every tool. Cordless is excellent for a drill. Corded sanders and routers are often economical when you already have a dust hose attached.
- Buying used equipment with missing guards. Price replacement parts before buying. Walk away when safety components are unavailable.
- Upgrading before checking setup. A sharp blade, square adjustment, and better support may solve the problem without a new saw.
- Buying for an imaginary specialty. Let completed projects reveal whether you need a miter saw, bandsaw, planer, or something else next.
FAQ
Should a miter saw be one of my first power tools?
For trim, decking, and repetitive crosscuts in long boards, move it up the list. For plywood cabinets and small furniture, it is less urgent because it cannot rip boards or break down wide sheets. A circular saw handles many early crosscuts.
Can I start woodworking without a table saw?
Yes. A drill, circular saw with a guide, sander, and appropriate dust control support many useful projects. A supplier can handle difficult stock preparation. Add a table saw when repeatable sizing becomes a recurring need.
Is a track saw better than a circular saw for beginners?
It can be easier to align and may offer better dust collection and cleaner guided cuts, but costs more. If sheet-goods furniture is your main interest and your budget allows it, a track saw can replace the basic circular saw in this sequence.
Which power tools are safest to buy used?
Condition matters more than category. Inspect cords, switches, bearings, guards, bases, and adjustment locks. With the seller's permission, test the tool safely under load. Unknown battery condition can erase savings on a used cordless kit.
What should I buy if I have only $300?
Buy a basic drill kit and corded circular saw, then reserve the balance for essential bits, a suitable blade, clamps, and eye and hearing protection. Borrow suitable dust collection and work supports. If you cannot arrange those essentials, have the supplier make your cuts and postpone the saw.
What should I read next?
Recommended tools
Digital Angle Gauge
Dial your blade in to 0.1°
View on Amazon →
Laser Tape Measure
Measure long spans solo, fast
View on Amazon →
Titebond III Wood Glue
Waterproof and stronger than the wood
View on Amazon →
As an Amazon Associate we earn from qualifying purchases.
Need ready-to-build plans?
5 complete build plans with cut lists — $14.