Finishing · 10 min read
Blotchy Pine Stain: The Cheap Fix Nobody Talks About
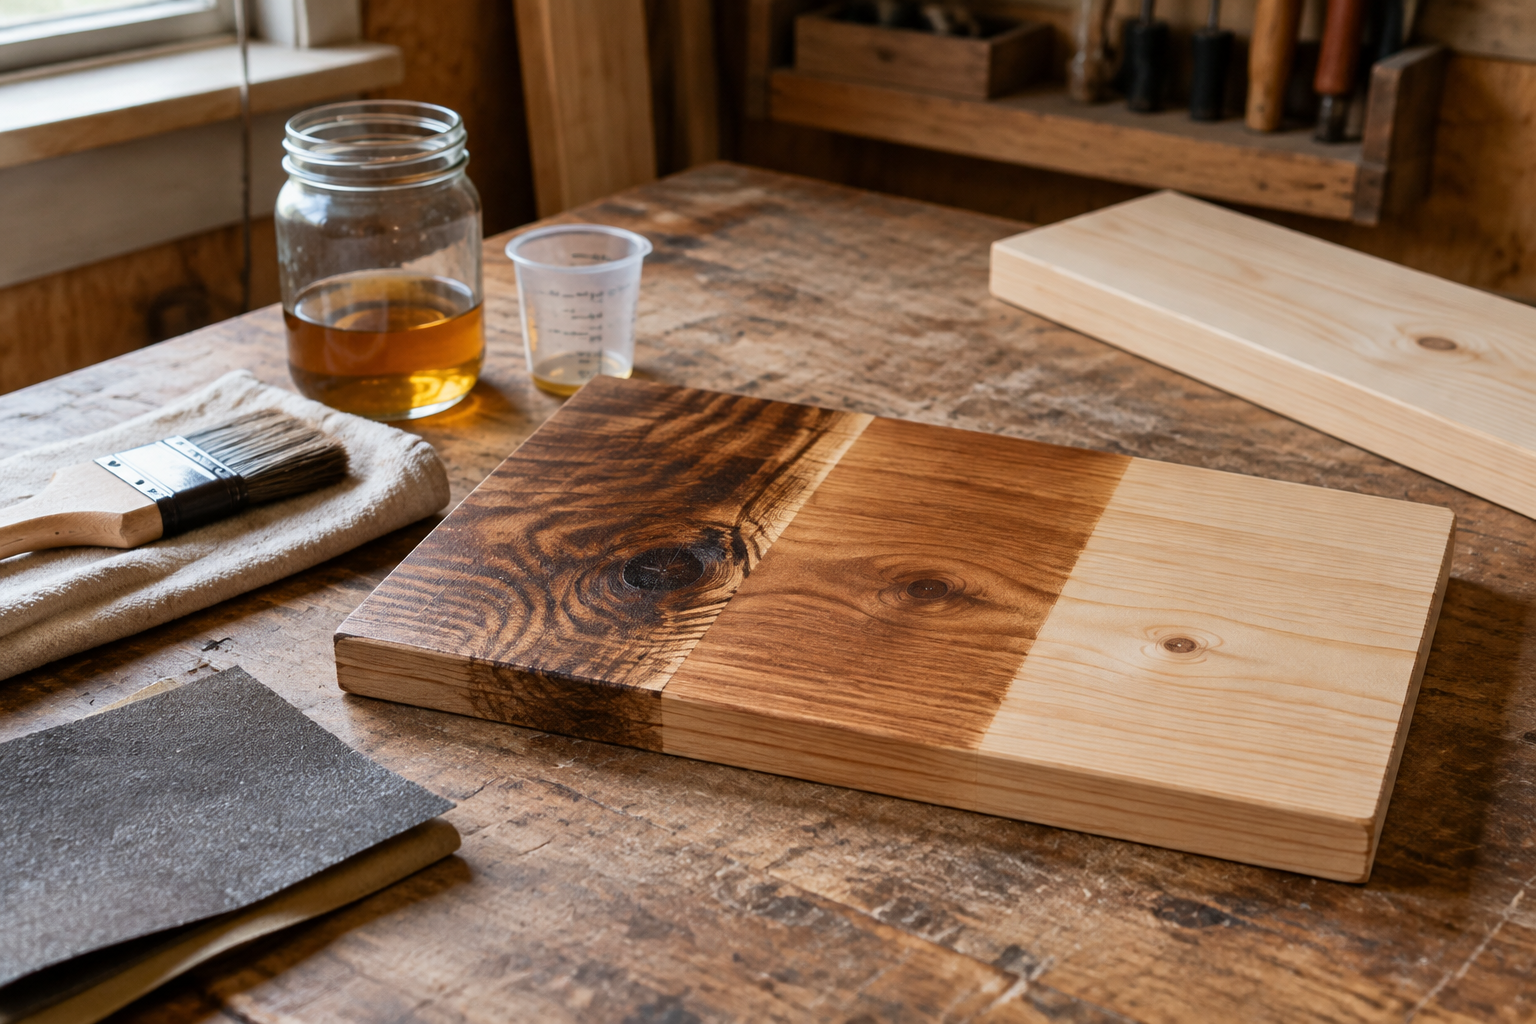
Blotchy pine stain is usually caused by uneven absorption, and a thin washcoat of dewaxed shellac can make the color much more consistent. Apply it before staining, then use a compatible stain—often a wipe-on gel stain—to build color without flooding the wood. It’s an inexpensive prevention step, not a treatment that pulls dark patches out of already-stained pine.
Why pine stain turns blotchy
Pine doesn’t absorb stain evenly across a board. Its alternating growth bands, changing grain direction, and exposed end grain create areas that take color differently. Knots and resin-rich patches complicate things further.
You can sand a board smooth and still get a dark cloud beside a nearly bare-looking patch. Smoothness and absorbency aren’t the same thing.
Three problems often get lumped together as blotching:
- Absorption blotches: Irregular dark areas where stain penetrates more deeply.
- Preparation defects: Swirls, cross-grain scratches, glue smears, and compressed fibers that become obvious under stain.
- Natural contrast: Growth rings, knots, and grain changes that remain visible even under a well-controlled finish.
A washcoat helps with the first problem. Better preparation fixes the second. Neither makes knotty construction pine look like clear walnut.
The useful target is controlled contrast—not identical color in every square inch.
The cheap fix: a dewaxed shellac washcoat
A washcoat is a deliberately thin sealing coat. It partially closes off the wood’s thirstiest areas before the stain reaches them.
Dewaxed shellac is useful because it dries quickly and works under many common finishing systems, subject to the manufacturers’ compatibility instructions. Buy a product explicitly labeled dewaxed. Don’t assume that every can marked “clear shellac” is dewaxed.
The economy comes from dilution: you need very little shellac resin for this job. Buying shellac and alcohol from scratch might not cost less than one can of conditioner, but the cost per small project can be low.
What shellac “cut” means
Shellac strength is traditionally described in pounds of dry shellac per gallon of alcohol. A 2-pound cut contains more resin than a 1-pound cut.
For pine test boards, start with approximately a 1/2-pound cut. Also test a 1-pound cut if the wood is especially uneven. Stronger sealing usually reduces absorption more, but it also reduces how much stain color the wood accepts.
For a ready-mixed product confirmed to be a 2-pound cut, use these approximate shop ratios:
| Target washcoat | Ready-mixed 2-pound-cut shellac | Compatible alcohol thinner | Best starting use |
|---|---|---|---|
| 1/2-pound cut | 1 part | 3 parts | First test on ordinary pine |
| 1-pound cut | 1 part | 1 part | Stronger absorption control |
| Undiluted 2-pound cut | 1 part | None | Usually too sealing for a first penetrating-stain test |
For a small 1/2-pound-cut batch, mix 2 fluid ounces of 2-pound-cut shellac with 6 fluid ounces of approved alcohol thinner. Those are liquid-volume measurements, not weights.
Check the actual starting strength. These ratios are wrong for products supplied at a different cut. Use only the alcohol thinner specified or permitted by the shellac manufacturer; rubbing alcohol can contain too much water or unwanted additives.
What does the washcoat cost?
As rough US retail estimates, a quart of ready-mixed dewaxed shellac may run $25–$45, while a quart of suitable alcohol thinner may cost $10–$20. Local availability and solvent restrictions affect both.
At those prices, a pint of 1/2-pound-cut washcoat mixed from a 2-pound-cut product costs roughly $7–$13 in materials, before applicators and waste. That’s more than you’ll need for many small projects.
Mix a small batch first. Old shellac that stays tacky or dries poorly isn’t a bargain.
Shellac washcoat vs. wood conditioner vs. gel stain
These products do different jobs. Gel stain is a colorant, not a direct substitute for a pretreatment, although its thicker consistency can reduce the dependence on deep penetration.
| Approach | Main advantage | Main limitation | Practical use on pine |
|---|---|---|---|
| Manufacturer-matched wood conditioner | Straightforward, documented stain system | Timing and application requirements vary | Good beginner choice when following one product system |
| Dewaxed shellac washcoat | Adjustable sealing strength; economical in small batches | Too much blocks color; compatibility needs testing | Useful when ordinary stain produces dark clouds |
| Gel stain on bare pine | Easier control of surface color | Can still blotch; heavy residue may dry poorly | Worth testing, but not guaranteed by itself |
| Washcoat plus compatible gel stain | Controls absorption and builds surface color | Can obscure grain if applied heavily | Strong candidate for medium-to-dark brown pine |
If a stain’s instructions prohibit application over sealed wood, don’t force it into a shellac schedule. Choose a compatible stain or use its recommended conditioner instead.
How to stain pine without blotches
1. Make a test board from the actual project stock
Use an offcut at least 6 × 12 inches (152 × 305 mm). A random scrap from another purchase won’t necessarily behave like your boards.
Divide it into three areas:
- Bare wood plus stain.
- 1/2-pound-cut washcoat plus stain.
- 1-pound-cut washcoat plus stain.
Keep the stain, wiping time, and applicator the same. Label the back, not the face.
If your project includes several noticeably different boards, test more than one. A pale, clear board and a resinous, knotty board may need different expectations even with the same schedule.
2. Remove glue and machine marks before final sanding
Dried glue often creates a pale patch that looks like failed staining. Scrape away squeeze-out, then sand the area evenly rather than digging a depression around it.
A typical bare-pine sequence is 120, 150, then 180 grit, assuming the surface is already reasonably flat. Start coarser only when necessary to remove defects.
Use the Sandpaper Grit Sequence Calculator to plan your progression, but let the remaining scratches determine when you move on.
Finish with light hand sanding along the grain. Use a sanding block on flat surfaces so your fingers don’t hollow the softer growth bands. Don’t polish random patches with 320 grit while leaving the rest at 150; that creates another absorption variable.
Vacuum thoroughly and wipe with a clean, lint-free cloth. Avoid oily or waxy tack-cloth residue.
3. Give end grain its own test
End grain can go dramatically darker than the face.
Start by sanding it one grit finer—for example, 220 grit on the ends when the faces stop at 180. Test whether the same washcoat controls it sufficiently.
If not, test a second thin washcoat on the end grain only. Keep it off the surrounding face to avoid a pale border. This is easier on loose parts before assembly.
4. Apply one thin, continuous washcoat
Support the board horizontally. Use a clean pad or brush suitable for shellac and spread a thin, even coat along the grain.
Work wet into wet. Avoid puddles, heavy overlaps, and repeatedly brushing an area that has started to tack up. Alcohol evaporates quickly, and fresh passes can disturb the previous film.
Let the coat dry according to the product instructions and shop conditions. Thin shellac often dries quickly, but a cold shop or unsuitable thinner can change that. Don’t proceed while it feels tacky or gums up abrasive paper.
If the surface has dust nibs or raised fibers, scuff very lightly with 320 grit. You’re knocking off roughness, not sanding back to bare wood. Uneven sand-through defeats the absorption control you just added.
5. Apply stain conservatively
Use a stain approved for the prepared surface. For a compatible gel stain, apply a thin coat and wipe away excess according to the label.
Work in manageable areas, completing an entire board or reaching a natural break before stopping. Use consistent wiping pressure and clean sections of cloth.
Don’t leave thick stain behind to force a darker color. Excess can stay soft, wrinkle under a later coat, or interfere with adhesion.
If the result is too light, change the test schedule: try a darker stain, less sealing, or an additional stain coat if the manufacturer permits it. Don’t improvise on the finished tabletop.
6. Test the protective finish too
A stained sample isn’t finished until it carries your intended clear coat. Clear finish changes the apparent depth, warmth, and contrast.
Let the stain dry for the full required period—not merely until it feels dry to a fingertip. Confirm that the complete shellac, stain, and topcoat combination cures properly before committing to the project.
For quantities, use the Finish & Stain Coverage Calculator with the selected products’ coverage figures. A 24 × 48-inch (610 × 1,219 mm) panel has 16 square feet across both broad faces, before counting edges. Remember test pieces and applicator losses.
How to fix pine that is already stained blotchy
A shellac washcoat cannot reverse stain that has already soaked in. Your choices depend on how dark the blotches are and whether a protective finish has been applied.
If the stain is still wet
Stop adding more. Wipe away excess using the stain manufacturer’s instructions and permitted cleanup method. Don’t flood the board with an unrelated solvent.
You may reduce surface buildup, but deeply absorbed dark areas will probably remain.
If the stain is dry but has no topcoat
For severe blotching, sanding back to a uniform bare surface is usually the most predictable repair. Stain penetrates, so a quick scuff won’t necessarily remove it.
On solid wood, resand the whole visible face rather than chasing each dark spot. Aggressive spot sanding can leave shallow dishes that show under reflected light.
On veneer, avoid aggressive sanding: the face layer may be too thin. Stripping may remove binders and some color, but it doesn’t guarantee removal of absorbed stain.
For mild blotching, a tested, compatible glaze or gel-stain treatment over a properly prepared sealing layer can reduce visible contrast by darkening lighter areas. It won’t lighten dark ones, and additional color may obscure grain.
If the piece already has a clear coat
Don’t apply penetrating stain over the finish and expect it to soak through. Clean and prepare the existing coating according to the chosen refinishing system, then test a compatible glaze or toner—or strip and restart.
For inexpensive pine, paint is sometimes the better repair than days spent pursuing a transparent finish the wood won’t support.
Common mistakes when staining pine
- Using ordinary wax-containing shellac without checking compatibility. Specify dewaxed when building this schedule.
- Applying a heavy shellac coat. A washcoat should control absorption, not create a thick, glossy barrier.
- Expecting conditioner to erase grain contrast. It moderates uptake; it doesn’t change the wood’s structure.
- Ignoring stain instructions. Some stains need bare wood or a specific pretreatment.
- Judging color before the topcoat. Evaluate the complete finish on scrap.
- Trying to hide glue with darker stain. Remove the contamination instead.
- Treating every dark mark as blotching. Knots, resin, and sanding scratches need different responses.
Shop safety for shellac and stain
Alcohol-based shellac is flammable. Keep it away from pilot lights, heaters, sparks, and other ignition sources. Provide ventilation; don’t assume an ordinary fan is suitable for moving flammable solvent vapor.
Wear eye protection and gloves appropriate to the product’s safety data sheet. Control sanding dust with extraction and suitable respiratory protection. A dust mask does not protect against solvent vapor.
Oil-based stain rags can self-heat and catch fire. Never leave them bunched up or toss them into ordinary trash. Follow the label and local disposal rules; a common interim method is storing them submerged in water in a tightly closed metal container pending approved disposal.
FAQ
Will shellac fix blotchy pine after staining?
Not by itself. Shellac can seal existing color before a compatible corrective finish, but it won’t remove absorbed dark patches. Severe blotching usually means restarting or accepting a darker, less transparent result.
Is dewaxed shellac better than pre-stain conditioner?
Not universally. Shellac gives you adjustable sealing strength; a matched conditioner-and-stain system gives you documented application instructions. Compare them on your actual pine rather than choosing by product category alone.
Can I use water-based stain over a shellac washcoat?
Only when the stain manufacturer permits that surface preparation. Some water-based products work over suitable sealed surfaces; others require bare wood. Test color acceptance, wetting, drying, and the complete topcoat schedule.
Why did the pine turn too light after the washcoat?
The washcoat restricted penetration more than you wanted. Test a weaker washcoat or a compatible darker gel stain. Don’t sand scattered areas through the sealer to make them darker—that can recreate blotching.
Can pine stained dark brown look like walnut?
It can become an attractive dark-brown wood, but its growth rings, knots, and texture remain pine. Aim for balanced color and visible grain rather than an exact walnut imitation. A carefully tested washcoat-and-gel-stain schedule is a practical place to start.
What should I read next?
Recommended tools
Digital Angle Gauge
Dial your blade in to 0.1°
View on Amazon →
Laser Tape Measure
Measure long spans solo, fast
View on Amazon →
Titebond III Wood Glue
Waterproof and stronger than the wood
View on Amazon →
As an Amazon Associate we earn from qualifying purchases.
Need ready-to-build plans?
5 complete build plans with cut lists — $14.